Sunday, April 28, 2013

Christmas Fruit Salad


At last…...the promised Christmas Fruit Salad recipe......in APRIL!!  


As I understand, this recipe was developed by my Grandma Guthrie as an appealing breakfast on Christmas morning when her children were too excited to eat.  

This tradition continued into the 2nd generation as I was growing up, then on into the 3rd with our children. 

Hmmmm….I wonder if the next generation will be enjoying the same Christmas breakfast????!   I expect so, since I have requests for this each year!


Christmas Fruit Salad

1 pkg  (3 oz)  lemon jello
1 cup hot water
1 large can sliced peaches,  drained and diced…..*save liquid
1 large can pears,  drained and diced…..*save liquid
1 large can pineapple tidbits, drained…..*save liquid
1 can mixed fruit (triple cherry is best), drained….*save liquid
2 cups, or more, miniature marshmallows

Dissolve jello in hot water.  Combine the fruits.  Add at least 1 cup of liquid from the fruit. Rinse marshmallows and add them to the fruit mixture. Chill for several hours or overnight.

NOTE:  I add much more liquid since we prefer it a little thickened but not completely jelled….probably about 3 cups, though I just guessed at the amount needed.

Thursday, December 6, 2012

Apple Butter, Apple Jelly, and Pumpkin Pie


                                    "Oh no!! December already!!!"


Time to skid to a stop and catch-up with some autumn recipes before moving on into the Christmas holidays!....

Since our apple trees did not produce well this year, we took a trip to our local apple orchard and bought some Winesap apples. The goal??? Grandma Guthrie’s wonderful apple butter that we loved so much while growing up!  

For many years, this recipe was missing until I recently happened upon it while looking through a box of old recipes. Hidden in the same box were also long-lost directions for making pickled beans and pickled corn…which I’ll tell you about some day!

It was surprising to me to find that the only spice Grandma used in this recipe was cloves!   My uncle remembers her adding cinnamon red hots, so I think she must have experimented a bit.  The flavor of this one, however, is what I remember liking so well and my sister agrees with me.

Now if only I could find the recipe for Grandma's Fried Apple Butter Pies!  Ahhh…the treat everyone remembers, but few, if any, have been able to duplicate.  Could the difference have been frying them in an iron skillet on a wood stove?  Quite possibly.  Maybe it was that she used biscuit dough rolled very thin?  How about the oil… what  would she have used?   Lard?  Crisco?  I had hoped to experiment and make some pies for this blog, but that will have to wait until after the holidays!


 Anyway….here’s the elusive Apple Butter recipe.  Maybe you will want to try it some day and then experiment with Fried Apple Butter Pies!


GRANDMA'S APPLE  BUTTER

Scrub the apples…Winesap is preferred but Red Delicious is good.   Remove the blossom end and stem.  Slice about ¼” or peel and slice—as preferred.
Cook apples in sauce pan or kettle over low heat with a little water…about 2 cups to a 6-8 quart kettle.  Stir frequently. 
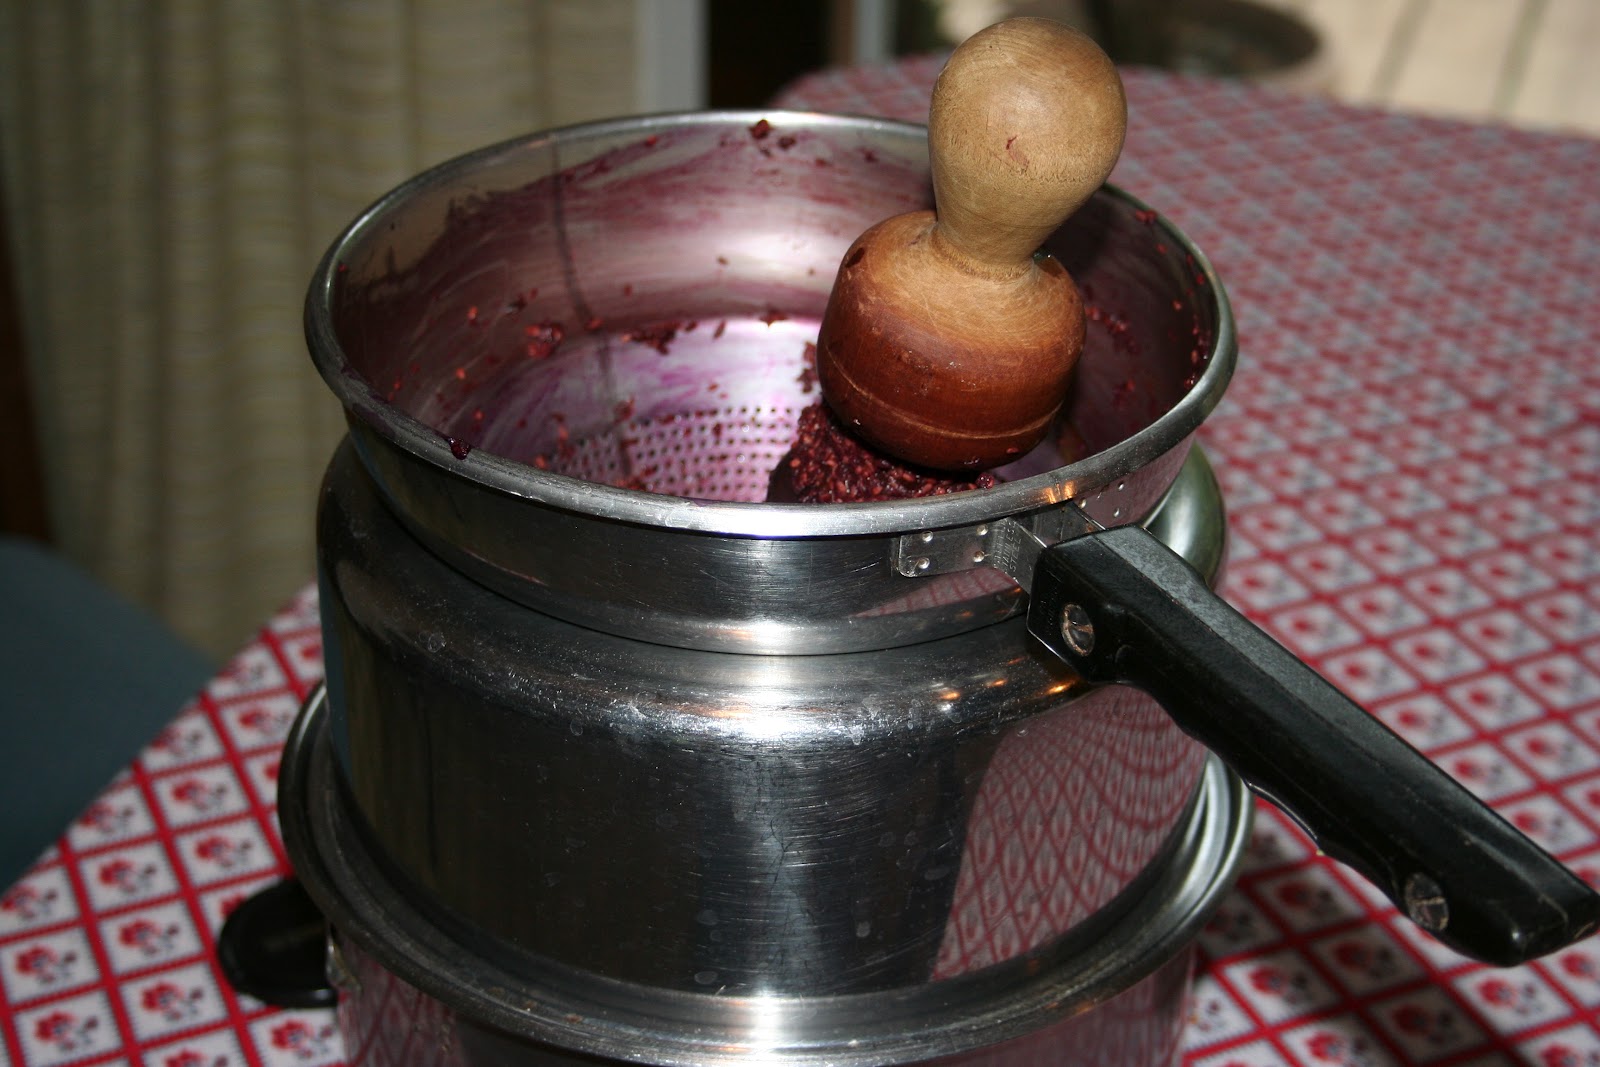
When apples are tender, rub them through a sieve or colander to make a sauce.
Pour the sauce in a large stainless steel or enameled pan.  Cook in the oven at 325-350 degrees stirring frequently.  Cook until very thick.
Add sugar to taste and cook 1 hour longer.  
Add a few (3-4) drops of cloves to 1 cup of apple butter.  Stir and mix well.  Drop by spoonfuls over the top of the pan of apple butter.  Mix thoroughly.  Oil of cinnamon may be added or a mixture of oil of cinnamon and oil of cloves if desired. 
Fill hot jars to within ¼” of the top.  Process in a hot water bath for 10 minutes to seal.


Now for a few personal observations:

~ My first taste of the apple butter was disappointing…much too “clovy.” So, I let it simmer, and simmer, and simmer.  What a difference! There was the taste I was looking for!  For the second batch, I added the cloves before putting the pan of applesauce into the oven instead of after it thickened.  Perfect!

~ Add the clove oil with care.  An extra drop or two goes a long way; it’s easy to get too much. I remember even Grandma’s apple butter had a bit of a stronger clove taste some years than others.


APPLE JELLY


Mounds and mounds of apple peelings! ....What to do with them???
Why, Apple Jelly of course!!  

 I made sure to clean the apples thoroughly with vinegar and then soapy water. After comparing several online directions, I decided to follow the tutorial at this site: http://emersonfamily.wordpress.com/2011/10/19/how-to-make-apple-jelly-from-apple-peelings/.  

Two tips I gleaned from other web pages were: 1) Refrigerate liquid overnight so the sediment will settle on the bottom, and 2) Carefully ladle out the juice into a measuring cup to keep the sediment from mixing with the juice and causing cloudy jelly.  Using the Sure Jell Pectin method was so simple and the jelly got rave reviews!


AUNT MARY RUBY'S PUMPKIN PIE

I LOVE this pie!  It is more like a light, custard and is soo good ..... even without a crust!  It originated with my great, great Aunt Ruby.


2          Eggs, separated
            Pinch of salt
1  Cup Cooked and strained pumpkin (we like to use butternut squash)
½ Cup Sugar
1  Tsp  Flour
1  Tsp  Cinnamon
¼ Tsp  Cloves
1  Cup Milk, warm or hot  (Canned milk diluted makes a creamier pie)
2  Tbsp Butter, melted

Add pumpkin to beaten yolks; combine sugar, flour, cinnamon and cloves; add to pumpkin/egg mixture; add milk and butter.

Beat egg whites until stiff and stir well into mixture; pour mixture into unbaked pie shell.

Bake for 15 minutes at 425 degrees; lower temperature to 325 degrees and bake an additional 30 minutes or until knife comes out clean.

That's all for this time!  Our traditional Christmas morning fruit salad coming up...and maybe some of Grandma's special Christmas-time cookies!


Sunday, September 9, 2012

Homemade Elderberry Flu Medicine


"You have some elderberries!" my cousin exclaimed one day as she was leaving our home.  I hadn't even noticed!...and anyway, what are they good for???   I immediately began an online search.


Do you know that elderberries contain a natural antioxident called anthocyanin which is a powerful immune booster?  The berries have been used medicinally since Hippocrates' time (BC 460-BC 370).  According to the book, Smart Medicine for Healthier Living, page 290, a 1995 study showed elderberry extract   "reduced both the severity of flu symptoms and also the duration of flu from 2-3 days in the treated group versus 6 days in the placebo group."  
                                
Melissa at www.kellythekitchenkop.com says  "I have successfully warded off the flu and bad colds numerous times.  If I start feeling sick/ achy/ feverish, I start taking elderberry syrup whenever I think of it--along with extra Fermented Cod Liver."  

So.....let's get busy and prepare to stay healthy with some homemade Elderberry Syrup!


Snip off the ripe elderberry bunches...making certain they are not Pokeberry, the impostor that some have confused with the elderberry plant.  Check out the article, Elderberry vs Pokeberry, at www.herbalrootzine.com for pictures that clearly illustrate the difference between the two plants.


 Remove the berries from the stems, keeping only the black or blackish-red berries. This was the most time-consuming part.  Some people use a fork, some use a wide-toothed comb and some use their fingers as a comb to rake through the berries, pulling them off the stems into the bowl.  If you freeze them for a bit first, the process may be easier.  Stems are toxic to eat, so only keep the berries. Also be sure you are wearing old clothes...elderberries stain!!  Put the berries in some ice water and allow any debris to float to the top...which you will pour off.


             Finally!  All the berries are off the plant and ready for the juice to be extracted. 


 Ahhh...What a lovely color!  Use the immersion blender set on low to break up the berries....but don't beat so much that the seeds are crushed.  Now pour this into a heavy pan and bring to a boil, stirring often. Remove from heat.


 Separate the pulp and seeds from the juice!  Allow the juice to cool before adding the honey so the enzymes in the honey are not destroyed. 


Add the honey...equal amounts with the juice you have extracted. Mix well, put in jar(s) and store in the refrigerator or freezer.   Mmmm---Mmmm good!

  Some people sweeten and preserve the syrup with sugar, but honey has so many healthful properties, you get a "double whammy" by using honey. (However, use sugar if you plan on giving some to your child who is under 1 year old.)  Others also add 1 cup of apple cider vinegar for extra health benefit. Then there are those who add rose hips, ginger, cinnamon, cloves, etc.

I found many, many blogs and other web sites with information on making elderberry syrup....each having added information or  slight variations to the process.  I found www.honest-food.net to be the only one using the immersion blender and no water.  Jill at www.jillshomeremedies.blogspot.com was very helpful when making my second batch using dried berries.  Here are the recipes I used for my 2 batches:

Batch #1:  3 pounds elderberries, destemmed
                  Raw honey to equal the amount of juice you extract                                                    
                  Follow the directions above in the tutorial.


Batch # 2: 2 cups dried elderberries
                 4 cups water
                 3 cups raw honey, local if possible

                   Bring berries and water to a boil and simmer about 30 minutes. Use the immersion blender to break up the berries.  (If you don't have an immersion blender, you may use a food mill to break them up.)  Separate the berries and juice from the seeds using a food mill. Allow the juice to cool, then add the honey.  Mix well, put in jar(s) and refrigerate or freeze.

How much should you take???   Whatever you wish since you cannot overdose.  But to maintain the immune system: Adults-1 Tablespoon/day; Children-1 Teaspoon/day.  Take the same amount hourly if sick.  It is more effective to take small amounts often than large amounts occasionally.

Did you know you can buy Elderberry Syrup at the store? You might find it under the name, Sambucus nigra which means black elderberry. Berry Well is also the name of one on the market. These are much more expensive to buy than to make! 

Where can I get dried elderberries?  I ordered mine very reasonably from Frontier Natural Products through our local food co-op. You may also order from the Bulk Herb Store, www.bulkherbstore.com, and Mountain Rose Herbs, www.mountainroseherbs.com.

What else can I do with elderberry syrup?  This is sooo good you can pour it over vanilla ice cream, mix it with plain yogurt, put it on pancakes, add some to sparkling water....so many possibilities.  The berries make a wonderful tea...just steep 1 teaspoon of the dried berries in a cup of hot water for 3-5 minutes....tasty and healthful!


Tea anyone??


Monday, August 13, 2012

1920's Prize-Winning Blackberry Cake


Quick!  Grab the last of those blackberries and whip up this delectable, prize-winning blackberry cake!  This recipe originated with Grandma Guthrie and is shown below written in her handwriting. She later made additional clarifications along the side of the paper.


My mother entered the recipe into the Charmco Pet ("pet" meaning "favorite") recipe contest in the late 1920's and won a $5.00 prize....a lot of money for a young teen back in those days!  Charmco 44 Flour, made by the Charleston Milling Co. in Charleston, WV, was required to be used in the contest recipes.


My mother is pictured to the left.  Notice the newspaper clipping below with her name, Nellie Guthrie, listed as a winner.


This blackberry cake has always been one of my most favorite of cakes. Care must be taken with the icing to allow it to cool completely after heating or it will be grainy. Be sure to beat it until it is thick enough not to slip down the sides of the cake....as you can see in the picture below, it did for me!  However, if beaten too long, it becomes impossible to spread. Even though the icing is a little tricky, it is certainly worth the effort!!  


Blackberry Cake
2 Cups white sugar
¾ Cup butter
½ Cup buttermilk
1 ½ Cups canned blackberries, with juice. 
  (Heap blackberries up and fill juice to the top of the cup).  *See note below.
3 Eggs
3 Cups flour
1 Teaspoon baking powder
1 Teaspoon soda
1 Teaspoon each:  allspice, cloves, cinnamon
     (Grandma sometimes used ½ teaspoon of each for a less spicy blend.)
½ Teaspoon salt

v  Cream butter, then add sugar gradually and beat until fluffy.
v  Add eggs 1 at a time, beating well after each one.
v  Add juice from the cup of blackberries and mix. (Save the berries to add last)
v  Sift together flour, baking powder, spices, soda, and salt 3 times.
v  Add flour mixture and buttermilk alternately to the batter and beat well.
v  Stir in berries gently to keep them as whole as possible.
v  Pour into 2 round, greased and floured cake pans and bake at 350 degrees until done.  (Grandma baked the cake in 2  #8 iron skillets.)

Icing
2 Cups white sugar
½ Cup butter
½ Cup evaporated milk or sweet milk

v  Cook until thick….225 degrees.  Cool completely. (Set pan in cold water to cool faster.)   When cooled, beat until creamy and thick enough to spread.  Use immediately.  


Notes:
*Although the recipe calls for canned blackberries with juice, you may use fresh berries and fill the cup with water.

* You may use 2 cups sugar and 1 cup cream instead of the given ingredients for icing.  OR, an alternate and easier glaze (but not as good, in my opinion!) is 1 cup powdered sugar, 1-2 tablespoons of milk, and ¼ teaspoon of vanilla.  Mix and drizzle over the cake.


Next up: … Ever make elderberry syrup?  ….Know its amazing benefits for your immune system?   Watch for my next blog!

Sunday, July 29, 2012

Blackberry Reward


Welcome to my blog!

As a way to share and record memories and recipes from years gone by, my wonderful husband suggested I begin a blog.  Since he is the writer of the two of us, I am beginning this with some trepidation.  However, those of you who write your own blogs know the excitement and anticipation of your first blog!  Sooo...I hope you will return often and enjoy the memories with me as I share from the family's recipe box.

To the right is a picture of Grandma who lived from 1895 to 1982.  Of her many talents, cooking was certainly one. She knew  how to cook on a wood stove, preparing everything from pinto beans and cornbread to angelfood cake and lemon meringue pie. We loved to eat at Grandma's!

Few memories bring back feelings of love and comfort as do those stirred up in front of the old wood cook stove at Grandma's house.  I loved that old stove and was sad that it was left behind in the move to the new house across the road.  But the memories could not be left behind...memories of Grandma bustling about the kitchen cooking up a special treat.  And nothing was more special than Grandma's Blackberry Cobbler!

Many were the times that we climbed the steep, grassy hill called "Old Baldy" behind the farmhouse and returned home with buckets filled to the brim with luscious, wild blackberries.  Below is a picture of Grandma and Grandpa's house with "Old Baldy" to the right.  


Picking berries was fun...except for the occasional snake beneath our feet and the sudden raucous buzz of hidden junebugs. The best part, however, always came later that evening when we were rewarded with warm blackberry cobbler!! YUM!  


Blackberry Cobbler
1 Quart Blackberries* (juice and berries    if berries are canned)
¼ Cup Sugar or more if berries are sour
4 Teaspoons Cornstarch
Crust
1 Cup Self-rising flour
2 Tablespoons Butter or Shortening
6 Tablespoons Milk (or ¼ cup plus 2 tablespoons)
   Butter (for crust tops)
   Sugar (for crust tops)

Mix blackberries, sugar and cornstarch.  Pour in a 7x11 buttered, baking dish or pan and set in hot oven to heat while mixing the crust. (*Add more blackberries if you wish and adjust sugar and cornstarch.)  

To make the crust, mix flour, butter and milk as for biscuits and roll out.  Cut in pieces then place on hot berries.  Dot the top of biscuit pieces with butter, then sprinkle with sugar.

  Bake at 400 degrees for about 30 minutes or until well browned.


Coming Soon.....Blog #2    Need another blackberry recipe to use up all those berries you've been picking??  Watch for the next blog featuring an original prize-winning blackberry cake! Thanks for stopping by!!